

You’ve optimised your marketing campaigns, and now you’re seeing an influx of inbound leads. But how do you ensure these leads are efficiently routed to the right team members?
In this guide, I’ll walk you through setting up an intelligent lead routing and assignment system in HubSpot CRM. We’ll focus on leveraging data enrichment to classify leads and automatically assign them to the appropriate sales representatives, whether they are SDRs or account executives.
By the end of this guide, you’ll have a system that not only improves lead response times but also ensures high-value prospects are handled by your most experienced reps.
The challenge
Managing inbound leads effectively is crucial for maintaining a competitive edge. However, many companies struggle with:
- Slow response times to high-value leads: Delays in follow-up can result in lost opportunities.
- Inefficient lead routing: High-value prospects might be assigned to junior reps, increasing the risk of losing the deal.
- Lack of visibility and data: Without proper tracking, it’s difficult to optimise processes or coach team members effectively.
- Inconsistent customer experience: Poor lead management can lead to a fragmented experience for prospects.
The solution overview
We’ll set up a structured lead routing system in HubSpot CRM that:
- Utilises data enrichment: Classifies leads based on criteria such as industry keywords and employee count.
- Automatically assigns leads: Routes high-value leads to account executives and lower-value leads to SDRs.
- Prevents duplicate leads: Ensures existing leads are updated rather than creating duplicates.
- Assigns conversations appropriately: Enhances follow-up efficiency by directing communications to the right owner.
- Provides data for optimisation: Establishes a framework for collecting data to improve performance and coaching.
We’ll be using HubSpot’s Bounded Rational Enrichment (Breeze) Intelligence for data enrichment (but you can use any type of enrichment tool, incl. the legacy HubSpot Intelligence), setting up workflows for lead rotation and assignment, and ensuring the system scales with your business needs.
Video walk-through
Step-by-step guide
Step 1: Enable data enrichment with HubSpot’s Breeze Intelligence
1. Understand Breeze Intelligence:
-
- HubSpot’s Breeze Intelligence replaces the old HubSpot Insights and provides enhanced company data enrichment.
- It's designed to enrich inbound leads and companies, not for outbound prospecting and contact enrichment (at least as of this writing). You'd need to use 3rd party tools if you want this functionality (such as Clay).
- You can't turn HubSpot Insights back on if you activate Breeze. So, if you decide not to use Breeze Intelligence after activating it, you'll have no enrichment out of the box.
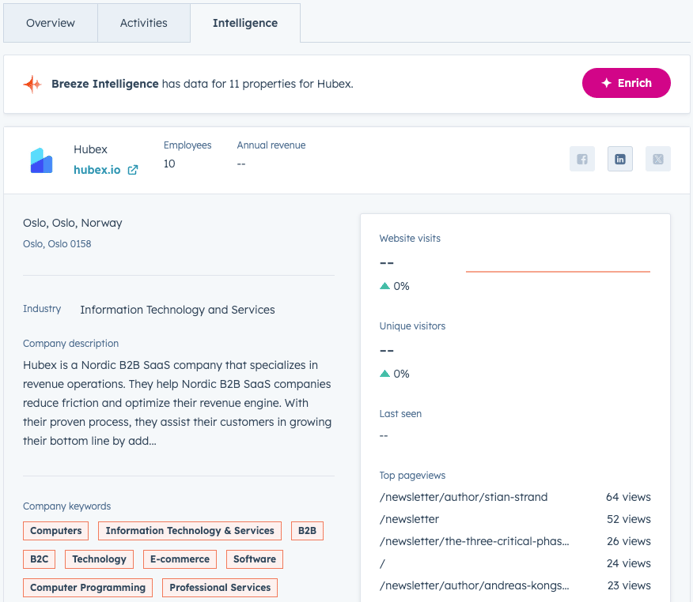
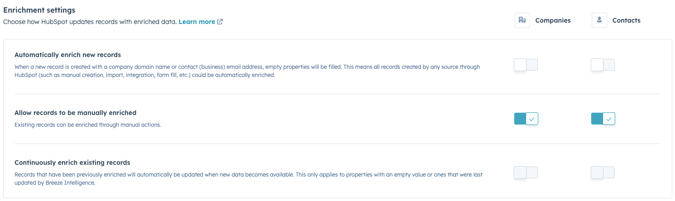
2. Enable Breeze Intelligence:
- Go to Settings > Data Enrichment.
- Enable the Breeze Intelligence feature.
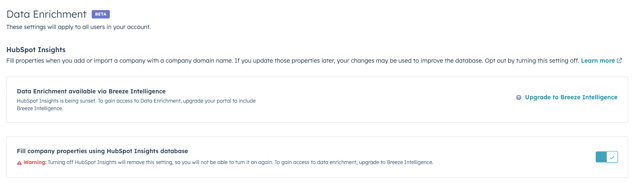
- There is currently no way to limit enrichment to inbound leads (e.g., form submissions). So be careful with the auto-enrichment if you or your team plan on importing a lot of contacts and companies in bulk.
Step 2: Define your ideal customer profile (ICP) criteria
1. Identify key criteria:
-
- Determine what makes a lead a high-value prospect.
- Common criteria include:
- Industry keywords: Does the company description contain keywords relevant to your ICP?
- Employee count: Is the company size within your target range?
- Geographic location: Is the company based in your target regions (e.g., Europe, the Nordics)?
2. Set negative keywords:
-
- Identify industries or keywords that signify a poor fit (e.g., “professional services” for your business).
- Use these to filter out leads that should not go to your account executives.
Step 3: Create workflows for lead segmentation and assignment
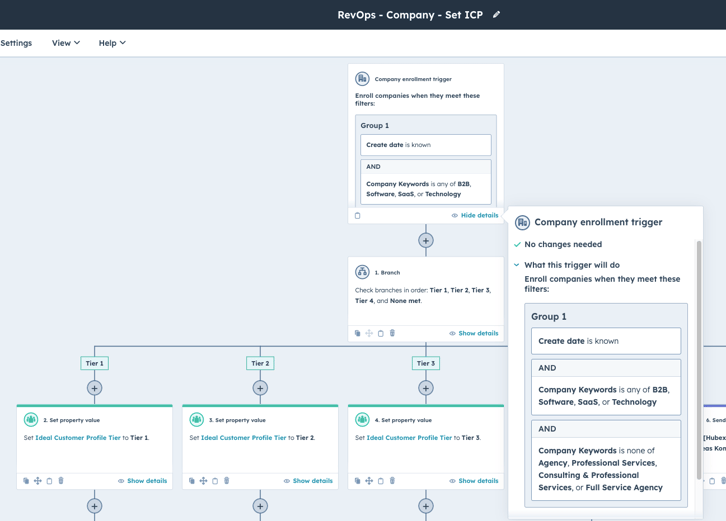
1. Set up the initial branching workflow:
- Create a new Company-based workflow.
- Set up the Ideal Customer Profile segmentation based on your ICP criteria.
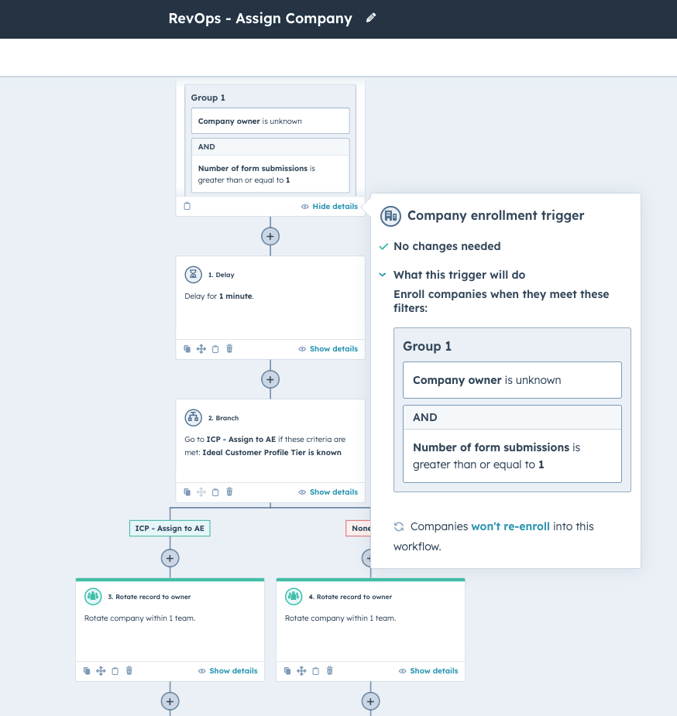
2. Assign companies to owners:
- Trigger the workflow when a new form submission occurs or when a conversation comes into your sales inbox.
- Add a condition to check if the Company Owner is unknown (i.e., no owner assigned).
- Go to Settings > Objects > Contacts.
- Toggle the assignment automation (if you're ok with a 5-10 minute delay in assigning conversations from the inbox); use workflows if you want it to be instant.

Step 4: Create leads and prevent duplicates
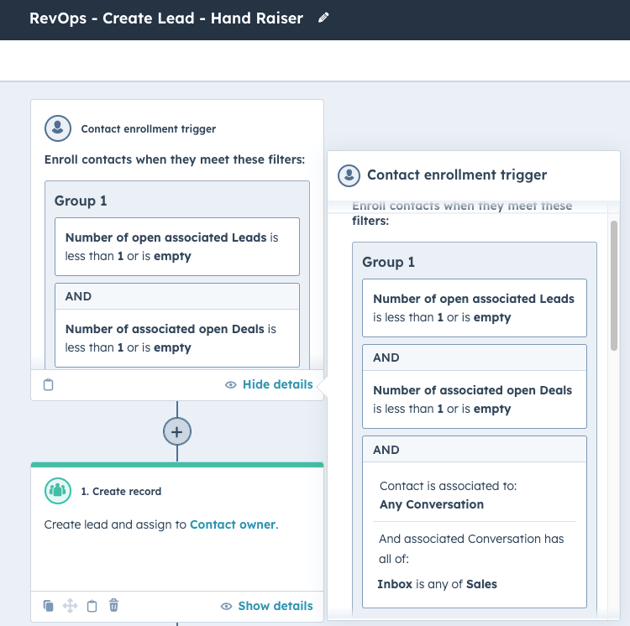
1. Create a workflow to generate leads:
- Create a Contact-based workflow that triggers when a contact submits a form or engages with your sales inbox.
- Add a check to see if there are no existing open leads or deals associated with the contact or company.
- If you want a recurring trigger, you'd need to add the forms as an enrollment trigger as the conversation inbox is a one-off trigger from a contact-based workflow.
2. Create the lead record:
- Use the action Create record to make a new lead in the Leads object.
- Associate the lead with the contact and company.
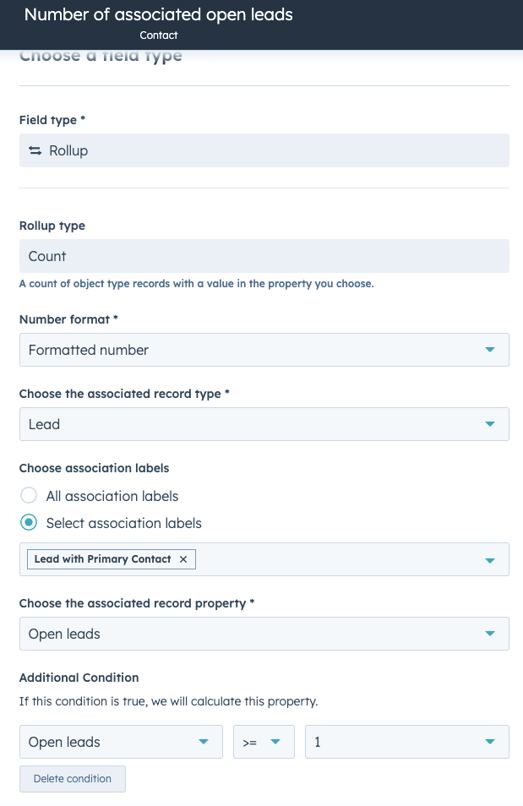
3. Prevent duplicate leads:
- Incorporate conditions in the workflow to check for existing leads.
- Use the Open leads property on the Leads object to see if there is an associated open lead (I didn't use this property in the video, only just realised it was available now by default).
- Note: We're also using a calculated property as we're using the open leads check for other workflows. The above should be enough for most use cases, though.
Step 5: Assign conversations to the correct owner
1. Understand conversation assignment limitations:
-
- Auto-assignment in the conversations inbox may not always work as expected due to delays in contact and company assignments for newly created contacts.
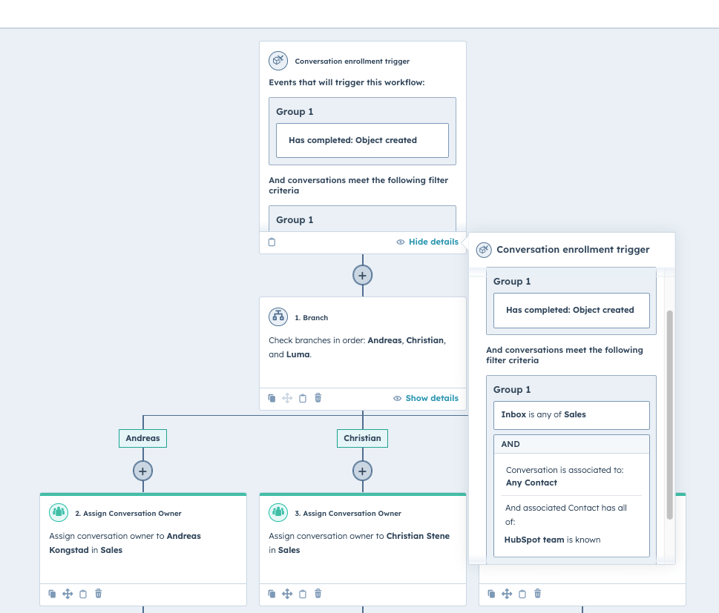
- It's currently not possible to copy the contact owner to be the conversation owner in a workflow. As such, we need to use branching logic.
- The Help Desk is currently a better solution for managing inbound leads, but you'd need both a paid sales and a service seat for the reps, which we're trying to avoid.
-
- Trigger when a new conversation is created in the Sales inbox.
- Make sure the company/contact assignment triggers have been completed (HubSpot team is known).
Up next…
In the next guides, I’ll continue our inbound lead management system setup:
- Workflow automation details: In the second part of the workflow automation, we'll look at the specific workflows and settings used to sync updates between the Lead and Contact objects.
- Actionable reporting and analytics: Learning how to build custom reports that provide actionable insights into your sales process and team performance.
- Scaling your lead management system: Strategies to adapt and expand your system as your business grows, ensuring continued effectiveness.